Locations determine what area of the project that the Issue or form belongs to. A location can determine a unique room. When adding an Issue, it will be automatically attached to the current location/room/plan
Adding locations is recommended to be done at the beginning of the project, throughout all plans so that issues and inspections can be added to all areas.
To add a Location on the Onsite Web Portal:
- Locate the “Add Location” icon (
 )from the Menu
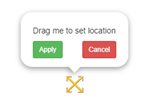
 - An “X” shaped bi-directional arrows icon appears on the screen. Position the location on the plan and Click on “Apply” to confirm its location or “Cancel“ to cancel adding it.
- A form appears where you need to fill in the Name of the Location and a short description of it for reference.
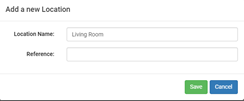
- After filling the information, click “Save”. The location will be added on the plan.
0 Comments